Saturday, June 13, 2015

Jergens Natural Glow Turned Me Orange and Streaky

I bought a small trial size bottle of Jergens Natural Glow sunless tanner moisturizing lotion just to see if it would work on me. I tried it on my arms, neck, and by mistake my face, it was a doh! stupid moment for me, lol! The second day after streaking and becoming orange on day one I tried it on my belly to see what it did there. On both days it turned certain areas orange and streaky and others nothing happened.

On my face around the forehead and by the eyes it looks like foundation that isn’t smoothed out. Between the eyes it looks like an orange dot that makes me look like I have a uni-brow, lol. My neck got really orange and streaky. I didn’t take a picture of my stomach but it made really dirty orange spots like I had dirt on me but I obviously didn’t as I put the Jergens Natural Glow lotion on after a shower. Oh yeah I applied it just like a lotion as it said to do but it had a weird reaction on me, obviously.

I don’t know if my skin is too light or I applied it wrong or it just doesn’t work for everyone. My sister who is as light skinned as I am had the same reaction before. She didn’t tell me about her reaction to it until I had bought the small trial size and tried it on myself. I am glad I didn’t buy a huge bottle or I would have gotten in contact with Jergen’s for a refund because it didn’t work on me but fortunately I only paid $1.97 for a trial size. I still feel it was a waste because I don’t know what to do with the trial size bottle now; I don’t want to just throw it away.

The orange spots have gone away now after a few face washes and showers. My mom keeps pointing out she can see orange around my neck but I don’t see it.

So I don’t know how well it works on some other people but I warn anyone who tries it to try it on their stomach or a place on their body that is covered by clothing just in case it turns them orange or streaks. Don’t put it on your face like I did, I am just glad it didn’t turn my whole face orange or streaky.

Oh and by the way the pictures don’t look half as bad as they did in person! Oh and enjoy the picture that shows the bags under my eyes, lol! And the popped eyes look, lol!


Edit to the post Celebrities Pretending to be Writers!

**This below is what I put on the edit to the June 10, 2014 post titled, Celebrities Pretending to be Writers! If you want to see the entire original post about the following book go to this link-
http://tabularasacoker.blogspot.com/2014/06/celebrities-pretending-to-be-writers.html

**
Okay so I had read comments about this book where people said they thought maybe people were being harsh and exaggerating the badness of this book so they read it only to prove it wasn’t very good indeed.

Well I vowed after writing the original post that I would pick the book up and read the first few pages which I usually do to see if a book interests me. I thought too maybe people were just you know exaggerating or hating and to be honest on my post I said I didn’t read it and never would but curiosity got the best of me, lol!

So a few days ago while at the local Books-A-Million with my mom I decided to try and find the book while I was in the Teen Books section. Since I write Young Adult Novels I like to see what is new and fresh and occasionally love to read some.

Usually when I see a book I read the first page to get a view of if it will draw me in. Since I am dead broke right now books are a luxury so I don’t buy even the ones I love, instead I put them on my To Read in the Future list, which I will admit is growing longer by the Day, Week, Month and Year, lol!

Okay so I assumed when looking for the book that there would be more than one and it would be easy to find even it has been out for a year now. I looked and looked and finally found it, they had only one copy there on the self.

So I picked it up and while standing there I flipped to the Prologue and began to read. I honestly expected it to surprise me and be good and make me want to read more. About one paragraph in I didn’t care why the character was digging to the surface of earth that they didn’t think people survived, or I think so as I kind of skimmed. So I thought maybe it is one of those Prologues that are kind of boring, though I admit I love a Prologue in books and heck I write seriously long Prologues for my novels but some Prologues can be boring so I skipped to the first chapter.

So the first page annoyed me. The writing was flat and just boring. Some words didn’t make sense or were spelled wrong and a few paragraphs should have been two paragraphs instead of one, they were way too long. Plus there was an area that had way too many and’s repeated. I can’t remember the words used but it was like this:

First part of sentence then Word and Word and Word and Word. – Didn’t look right to me, there should have been commas instead of ands. I just put in Word in place of the actual words I can’t remember, lol! Sorry it’s been a few days and I forgot!

I would have written something like this though much more polished lol! This is just my example not taken from novel- The heart of the dwindling fire mesmerized her senses as she watched enthralled by the smoke, ashes, embers, and the crackling logs.

Okay so I skimmed to the next page and couldn’t be bothered to care as the feel of the words didn’t feel right. You would think with the publishing house, editors, and ghostwriters they had that the book would be engaging, well written, and well edited but it didn’t feel that way. So I skipped to the end page and was like oh great there probably will be a sequel as others said.

I put the book down and went onto other books as I wanted to browse more engaging novels before my mom finished and was sure to ask if I was finished as I can be a lengthy browser at book stores. I can literarily spend hours browsing and occasionally buying, lol!

The cover wasn’t impressive, the story theme is over done, the wording was mediocre, there were grammatical errors, and it just wasn’t something that made me want to read more.

I really did go into it wanting to give it a chance but I didn’t care for what I read at all. I am sure maybe someone else may like it but I didn’t care enough to read more or put it on my To Be Read in the Future list.  

Saturday, May 23, 2015

Ribbon and Flower Headband

I wanted a headband to go with my new coral lace dress. I took some shear orange ribbon and measured it to my head. I found some small orange, cream, and coral flowers covered in glitter and with a faux pearl center at Michaels, they I think are supposed to be used in scrape books or as a decoration. I simply arranged the flowers to determine where I wanted them to go and then I hot glued them in place.

I took two ponytail holders and cut them at the point where the seam is and attached them to the end of the ribbons to hold it in place on my head. I got instant complements when I wore it with my coral lace dress.
 
I did learn something from these pictures, I need a tan, lol! I am way too white and have too fair of skin to get much of a tan unfortunately but I need one none-the-less, lol!

Ribbon- $1 at Dollar Tree

Flowers- $1.50 for a pack of I think 9 flowers at Michaels


Grecian Braided Circlet

I wanted a Grecian Circlet for a prop for one of my book covers but I decided to just hire someone to do my cover art but I had already made this Grecian Braided Circlet, or rather I call it a Grecian Circlet as it reminds me of a Greek Goddess. I have a lovely blue and white Greek inspired maxi dress but I am not brave enough to wear this with it, though I tried it at home for fun and it looked cute. I am not brave enough to wear a circlet in public unless for maybe a costume party or Comic-Con or something. I love it and it looks so cool but I made it a tad too small as I thought I would run out of wire but I had lots of left over wire, so the circlet is a tad tight on me.

I used gold wire instead of copper as is stated in the below link of instructions but any color is fine. Also I had no wire clamp so I used a heavy box of movies to clamp my wire to twist. Mine didn’t come out as thick as the one in the link either.

I will leave a link below to where I found directions, they are better then I could ever explain.

Wire- It was either $3.99 or $4.99 or $5.99 at Michaels but I bought it using a 40% off coupon, lol, sorry I can’t remember price as it’s been a while since I purchased it.

Links to Directions to Make a Wire Circlet:


Daisy and Narcissus Flower Headband

I saw a headband in a store that I liked but I didn’t like the price and knew I could make it cheaper at home. So I looked over the headband and then I went home to make it after I bought what I needed. I bought Daisy and Narcissus fake flowers at Wal Mart. I bought some burlap at Dollar Tree. I already had ponytail holders at home.

I bent the burlap in half and hot glued it in place. I then measured by eye balling it to fit my head and cut it back at the ends as needed. I then went to attaching, using hot glue, the Daisy flowers first at intervals with spaces between. Then I attached the Narcissus flowers when I had the Daisy’s just right.

Then at the end of the burlap headband I took two of my ponytail holders that is a simple one without one of the metal holds on it and cut it at the end where the seam was. On each side of the headband at the end as seen I hot glued the ponytail holders. Doing this allowed the headband to be maneuverable but also stay in place when needed.

I wore this headband to a Tea Party and I was complementing on going with the theme of wearing cute, funky, or interesting head pieces, or just any head piece you want to wear. I love to wear this with my green and pink flower dress, white sweater, and butterfly ear rings, the same outfit I love wearing with my butterfly barrettes I described before.

One of my good friends Stephanie wanted me to make her one as well and some of the pictures are of the one that I made for her. She liked it a lot and has worn it and loves it. Though I didn't add a picture of her wearing it as I haven't gotten her permission yet to add it. So you are stuck seeing me as the wearer yet again!

Daisy- $0.97

Narcissus Flowers- $0.97

Burlap- $1


Friday, May 22, 2015

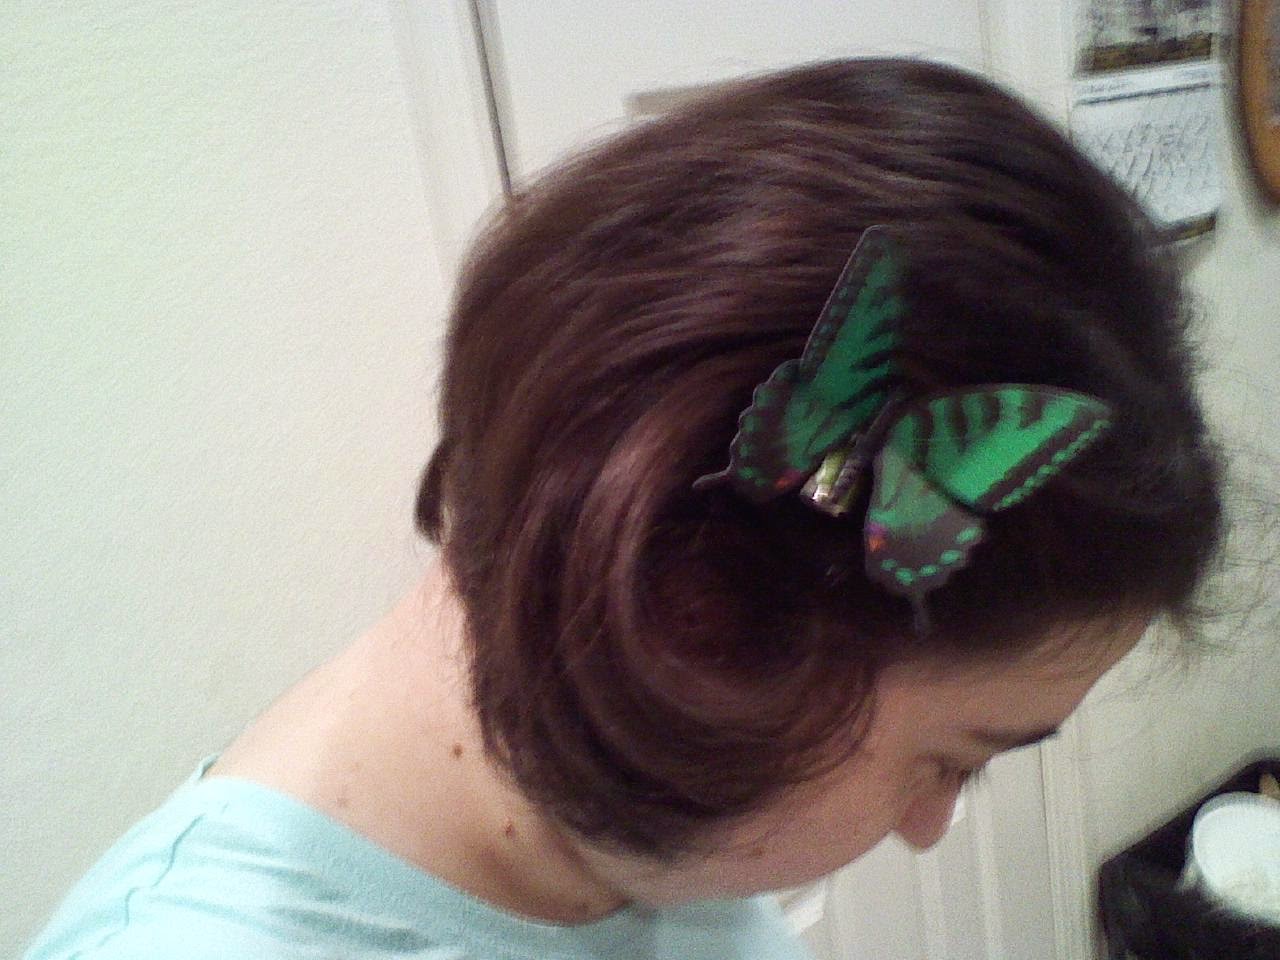
Butterfly Barrettes That I Made!

I bought my hair clips at Wal Mart years ago. I bought two packs of butterflies at Dollar Tree. There was a pack of 3 green butterflies and a pack of 3 yellow butterflies I loved and bought.

I took the little twist wires off the back of the butterflies, see the wires are meant to attach the butterflies to objects but I didn’t need them. I attached, with hot glue, the back of the butterfly to the barrette, I attached first a piece of the leaf from one of the flowers so as best to attach the butterfly as there would be a grip, any material will work so the butterflies will stay attached better. It took some maneuvering to get it right but I love the outcome. I have gotten so many complements on the butterflies when I wore them.

Barrettes- $2 something or $3 something

Butterflies- $2 for 2 packs of 6 Butterflies


Take a Look at My Purple Dahlia Flower Barrette and Autumn Leaves Barrette I Made!

*******

The Reason I close my eyes and my face is not all shown in all of the following blog posts is because I wanted the pictures to center on the head pieces and not the wearer. Also had I looked up it looks funny and odd as my head is tilted down and pictures where I look up like that look creepy, LOL! So I just looked down or closed my eyes all together and left most of my face out so the pictures would show the head pieces better.

*******

I have wanted to make some leaf hair pieces but had not a clue where to start. So while collecting props for a photo shoot I came across some Oak and Maple Leaves, fake ones of course. So I bought them and Sunflowers. Then later I bought some fake Purple Dahlia’s. I also found and bought some barrette backs.

So when I got home I looked at some flower barrettes I had bought years ago and mimicked the way they had been made. I took a small piece of the leave and clipped it off to hot clue it to the barrette surface. Then I cut the Dahlia flower and leaves off right at the stem, really short. Then I hot clued them onto the barrette back. It took some playing around to get them just so. It was fun, easy, and the result I am happy with.

Soon I would like to buy some metallic silver and gold paint to paint the leaves and make another barrette. There are a few other ideas I have too, like leaf and flower crowns.

I have already worn and been complemented on the Dahlia flower barrette and the Leaf one hasn’t been commented on yet but I love it none the less.

Leaves- $0.97 and other $3.00

Dahlia Flowers- $3.00

Barrettes- $ 2 something or $3 something